
User View Manager
The User View Manager is divided into three sections, but the overall intention is to get your content in front of your users.
Lessons Directory
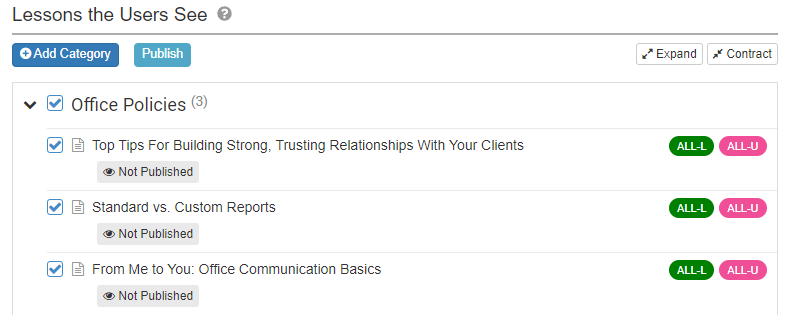
All of the Lessons you’ve approved in Our Content can now be placed in categories and published for your users to view.
On the Lesson Directory page you’ll see two columns:
Lessons the Users See and Lessons Not Yet Placed
To publish a Lesson you need to move it from Lessons Not Yet Placed to Lessons the Users See, and then select the Publish option.
There are a few ways to publish your Lessons.
Individually Publish a Lesson
First you need categories – these can be the same or different from your Our Content categories. Then, drag and drop your lessons from the right column to the left. Click the “Not Published” button below the Lesson, or after moving several Lessons you can select the whole category for a “publish all” button.
Need to make edits to a Lesson? You can unpublish it at any time, change the category, or remove it from all categories.
Place Category and Lessons Simultaneously

Do you have a number of unsorted Lessons in a Content Category? Use the “Place Category” button to move all your Lessons in that category at once.
To publish these Lessons just click on the check box beside the category name and it will select all the Lessons and give you the option to publish.
Bulk Sorting Lessons
If you have a number of Lessons (in different Our Content Categories] that are ready to be sorted, and can be moved to the same category follow these steps:
- Click on the Category heading under the left column (“Lessons the Users See”).
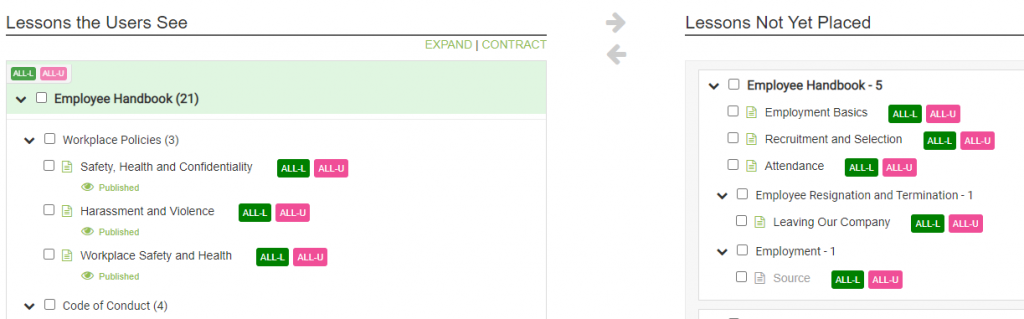
- Select the Lessons you want under the right column (“Lessons Not Yet Placed”). You can select all Lessons in a category by clicking on the check box beside the category name, or click on each check box beside the Lesson.
- Click the black arrow between the two columns to move the Lessons.
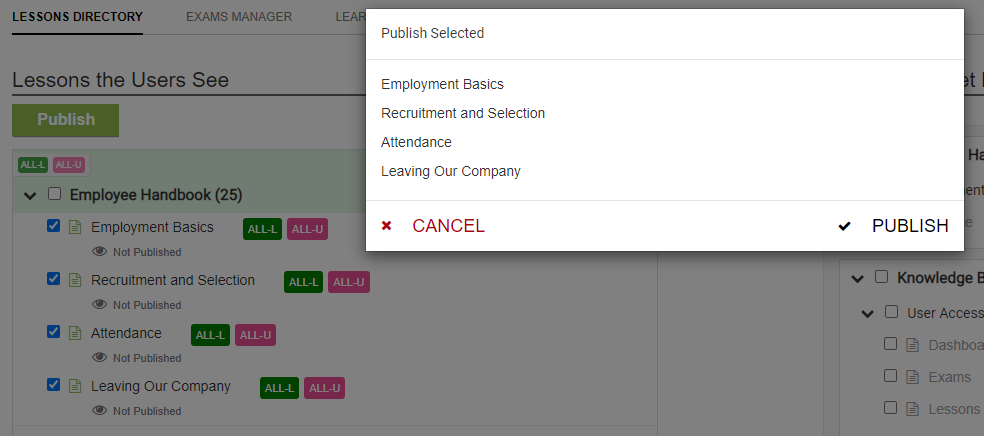
- Select the Lessons you’re ready to published from the left column. Clicking the check box beside the category will select all Lessons in the category – including those already published. But, there is no effect on any previously published Lessons (it won’t unpublish them, or “double” publish them).
- Click Publish.
Publish Confirmation
However you choose to sort your Lessons, when you’re ready for the Lessons to go “live” to your users you want to select the Lessons and the Publish option. You’ll see a confirmation box with all Lessons selected and available to be published. Click Publish here and all the Lessons will be added.
Removing and Moving Lessons
The first step in removing a Lesson is to unpublish it. Select the Lesson(s) and click the “unpublish” option – the same button as Publish.
If some of the Lessons you’ve selected haven’t yet been published, the option will be to Publish, so be sure to only select those Lessons you want to unpublish.
Unpublishing a Lesson hides it from all users but doesn’t remove it from the category itself. If you want to rearrange or sort categories you can drag and drop a Lesson to a different category, you can rename the category, and you can delete the category.
If you delete a category all of the Lessons will automatically be unpublished and unsorted (sent back to “Lessons Not Yet Placed”). Lessons are not deleted if a Category is deleted.
Courses Manager
The Courses Manager allows you to create and publish exams for your users. Courses can have supporting lessons – either optional or required to be completed before the user can take the Course Exam.
You can find more details on Courses here.
Learning Path Manager
Learning Paths let you identify content that is most important for your users to complete within a specific deadline. You set the learning path based on the User Group the user is assigned to.
You can find more details on Learning Paths here.