
Lessons
Lessons contain all the information you want to share with your users. Think of them like news articles. You’ll want to keep these to smaller, digestible chunks, of information that can be read and understood in about five minutes. If they are too long your users might forget some of the details they need.
Note: We use “Lesson” throughout, but it may not the right term for you. Maybe you already use “articles”, “courses”, or some other term. You can change the label for Lessons (and Courses!) in your Settings.
Creating a Lesson
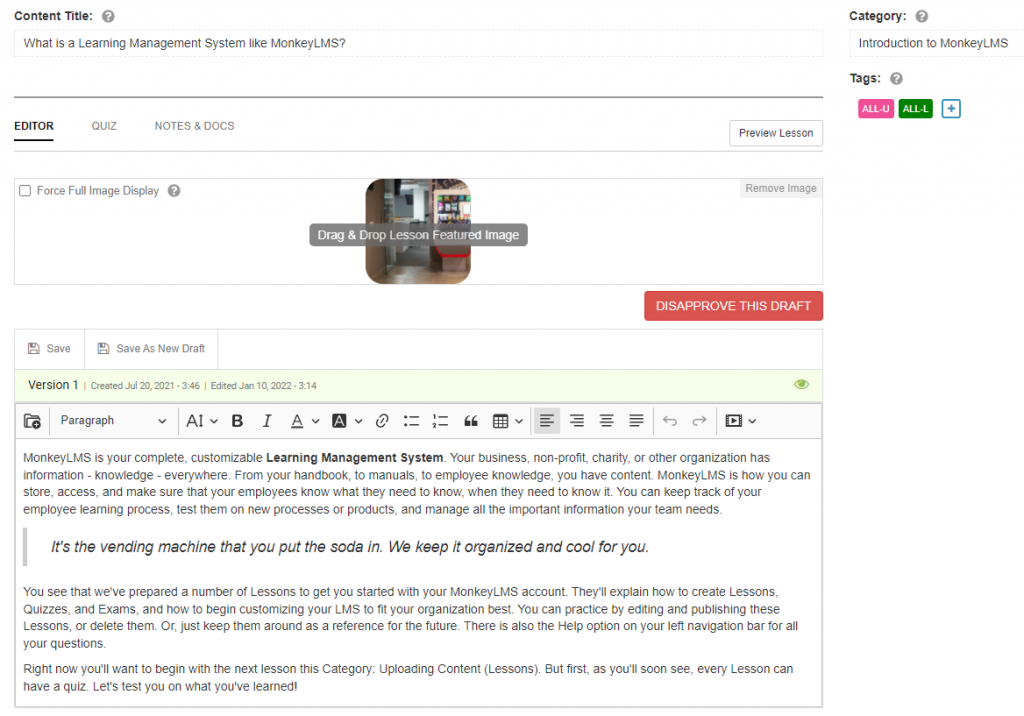
Before getting into the ‘meat’ of your content, you’ll need to ensure you have a title, have set a category, and chosen tags for your lesson.
The content title will be used throughout your platform, so you’ll want it to be descriptive and match the content. You can click anywhere in the box to edit it.
The category allows you to easily sort your content into the right groups. Click in the box to change the category at any time.
There are two types of tags: required and content related. Required tags set the User Group and Location of each content piece. All lessons have one or more User Groups and one or more Locations. By default the User Group is “Everyone” and Location is “Anywhere”. Check the link for more information about User Groups and Locations.
Content related are used only in the Our Content area. They aren’t required and they don’t restrict users from accessing the lessons once published. We start you off with some priority tags, but you can make more tag groups if you like. See more at our Content Tags page.
You can also set a featured image that will appear with the published lesson. You can drag-and-drop an image from your computer, or click on the box to open a file.
Writing a Lesson

MonkeyLMS uses a “What You See Is What You Get” text editor. This means that what you type is what will be shown to your users. Lists, tables, and headings make it easy for you to organize each lesson.
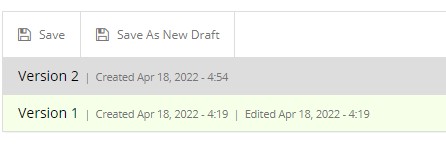
Note: Monkey doesn’t autosave your work – so be sure to click the save button often! The “save” option will save the current draft. You might make major changes to a page and “save as new draft” gives you the option to keep separate versions of the content. Only one version can be active at a time.
Images, Videos, and Other Files
You can add images, videos, and documents to each lesson.
Images can be “drag and dropped” into the text editor. Or you can use our file and image Library to upload and edit your images first.
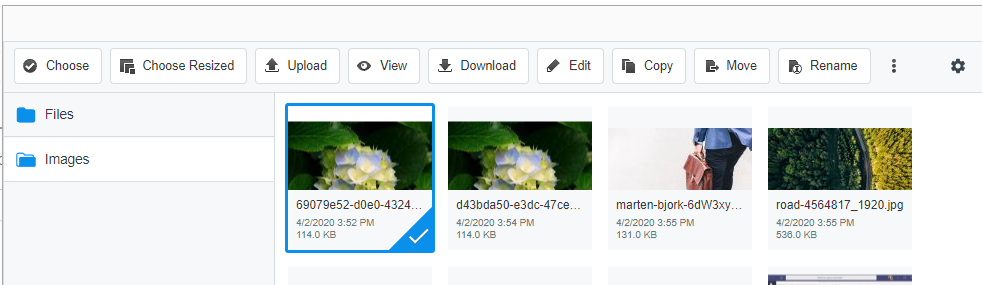
Images, videos, and other files (PDFs, .Doc, etc) can be uploaded to the Library and then added to the Lesson you’re working on or another Lesson in the future.
After uploading your video (accepted formats include .mp4, .mpg, .mpeg, .avi, .mov), select the video and click “Choose”. You can format it like an image – setting it left, right, or centered, in the Lesson content.
Quizzes
A key component of Lessons is including a quiz. For details on quiz creation, go here.
Approving Lessons
Once your lesson text is ready and you’ve chosen your save draft there is one last step – approving the draft.
This doesn’t immediately publish the lesson for your users to see. There is one more step (found in User View Manager). But, it does set the lesson from Draft to Approved in Our Content.
If Quizzes are enabled in your platform and you haven’t yet completed a Quiz for this Lesson you’ll see a notice informing you to either complete a quiz or proceed with approval. Quizzes are never required – but they’re a useful way to track user understanding.